Rebuilding and upgrading the coaster brake on an old Sachs Torpedo Duomatic model 102
The old Sachs Torpedo Duomatic kick-back two speed hubs from the sixties and early seventies were built to last and many of them are still running today. The earlier 102 model was equipped with a finely engineered brass brake shoe cylinder assembly. However, this type of brake will lose significant braking power as it wears. The later R2110 and A2110 models of the Duomatic hubs switched to a more simple serrated steel brake shoe assembly, probably to reduce production cost and maybe also to provide more consistent braking performance over time. Please note that different lubrication is needed for brass and steel brake shoes. This is covered later on this page.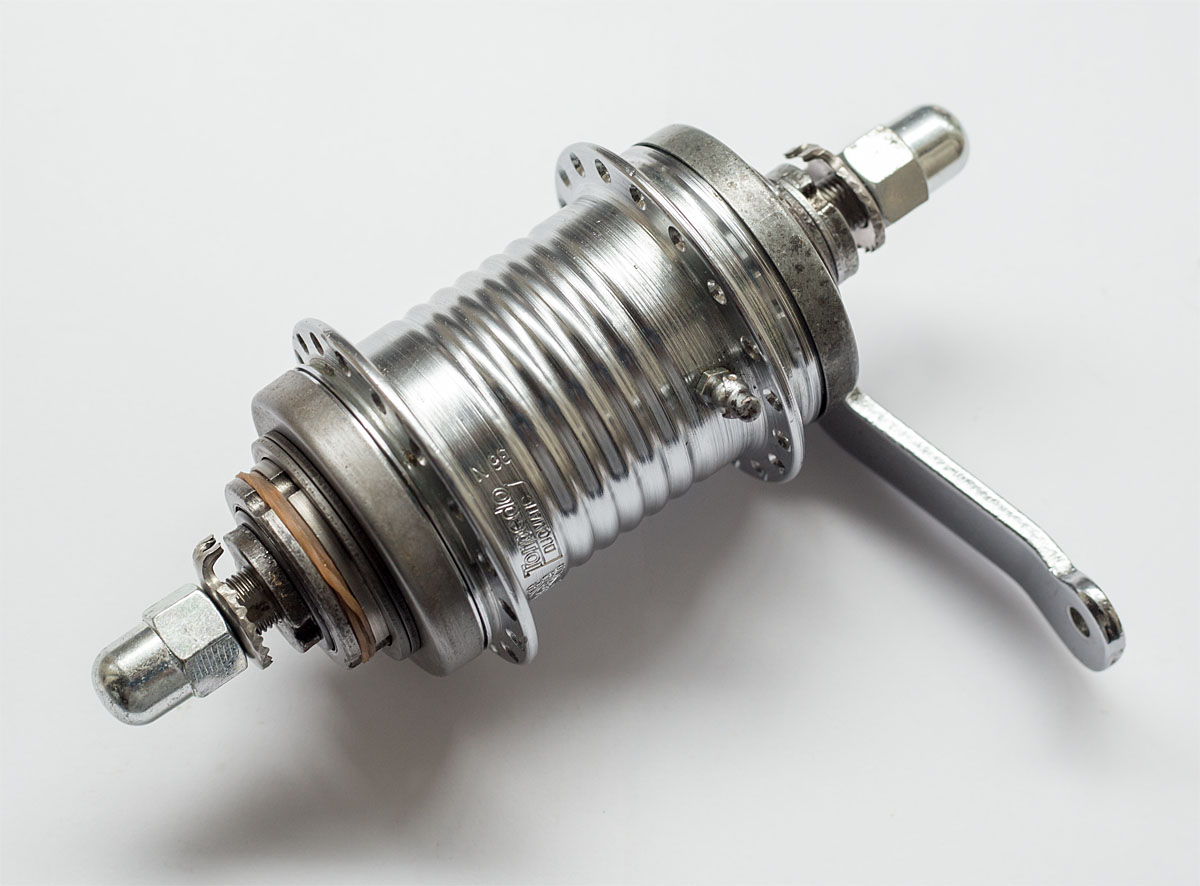
This page describes how to slightly modify a component of the model 102 so it can be upgraded from the brass brake cylinder to a newer steel from the Sachs/SRAM three-speed series of hubs, which is easier to find used or new.
The official procedure when switching to the R2110 steel version of the brake cylinder is to also change the brake cone friction spring with part number "0113 101 000" (black) to part number "0113 103 000" (copper colored). Here is a photo of the brake shoe assembly from the Duomatic model 102 and one from an R2110 with their matching friction springs. Note that the reach of the spring to the right is a little wider and the width of the slot in the brake cylinder matches the old type:
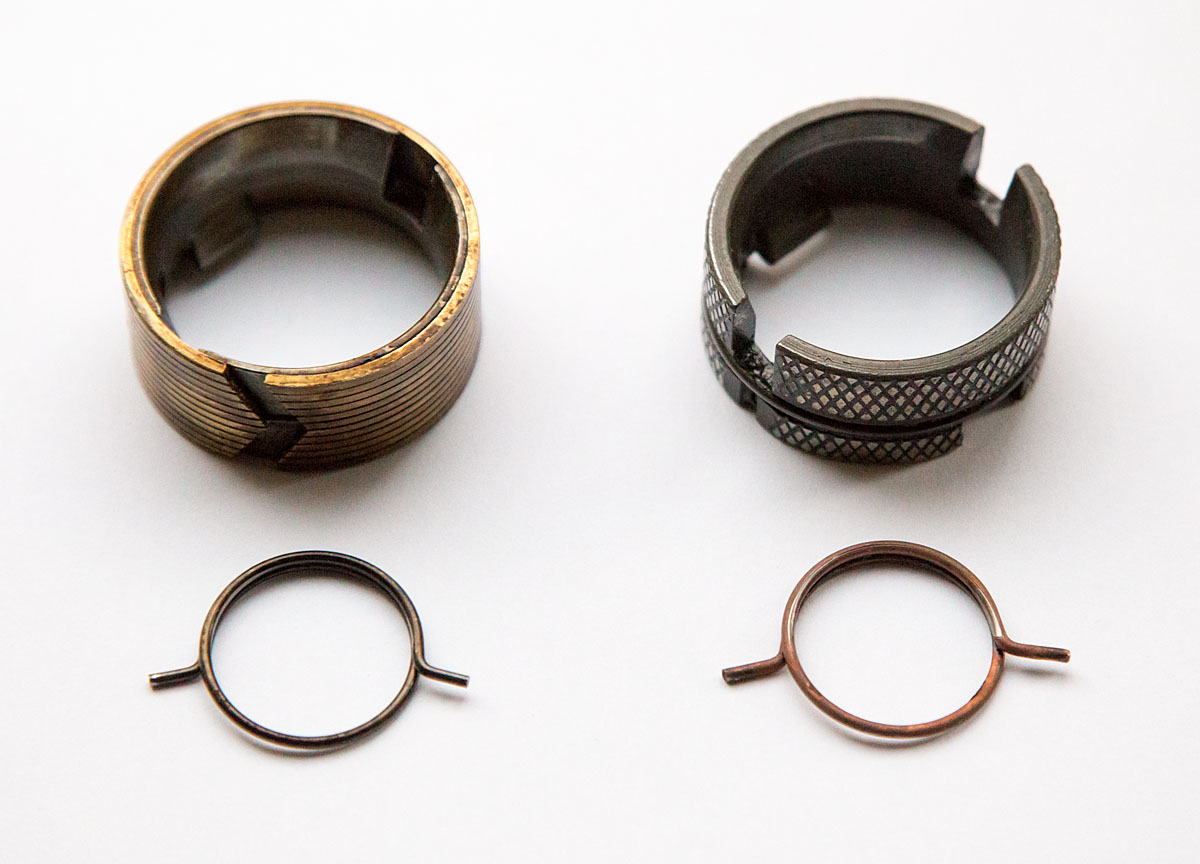
These springs and wide-slot cylinders are hard to find as spare parts. Instead, the shorter spring can be bent out a little to better fit the slots of a H3111/T3 three-speed steel brake cylinder both in the axial and radial plane.
Note: A new and unused late-version T3 steel brake cylinder (SRAM spare part number "00 0591 008 000", EAN 710845230646) of the type shown on the below photos will work, but cause the hub to start engaging the brake pretty close after the shifting point on the backpedal stroke. This is seemingly because of some small differences between the profile of the beveled inside edges on the cylinders compared to those of the earlier Dreigang model H3111 and Spectro three speed hubs, causing the brake to engage at a bit earlier rotational position when pedaling back. Because of this, an early model H3111 brake cylinder with the diamond pattern works best (even better if it is a little worn).
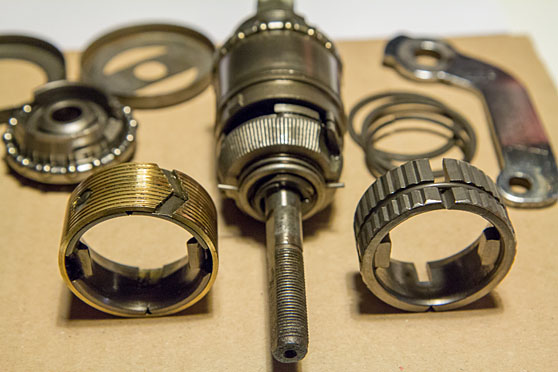
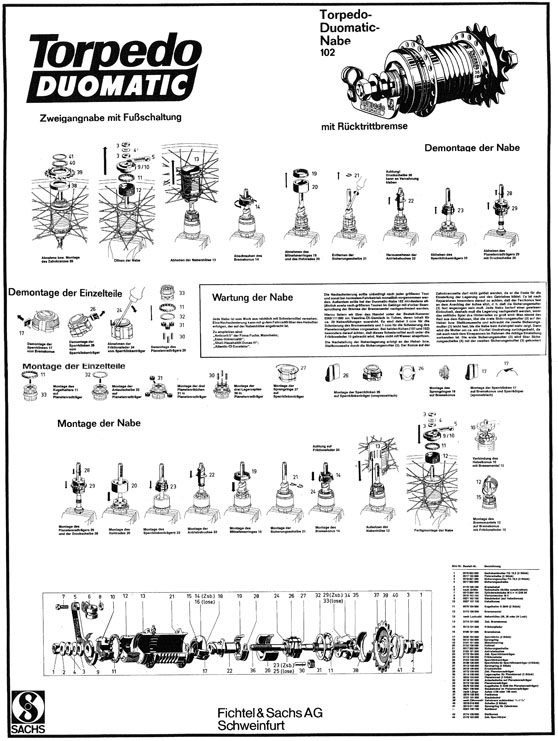
The old, worn brass brake cylinder on the left, the newer steel version on the right. In the background, the brake cone with mounted friction spring can be seen. The ends of the friction spring poke out and interfaces with slots in the brake cylinder. The old style brake cylinder is a composite steel inner part with an outer brass shell. The spring's ends need to go a little bit further out to properly grip the slots on the new type of brake cylinder because it is shaped differently on the inside. For instructions on how to disassemble the hub to this point, see the scanned workshop poster further down on this page.
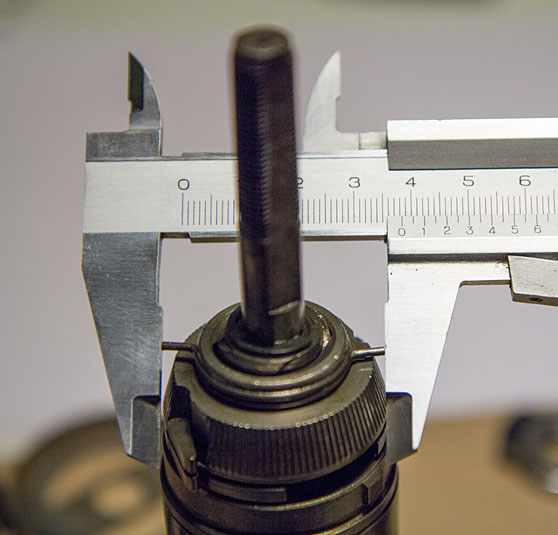
Measuring the reach of the standard, old style spring. It's about 38.4mm.
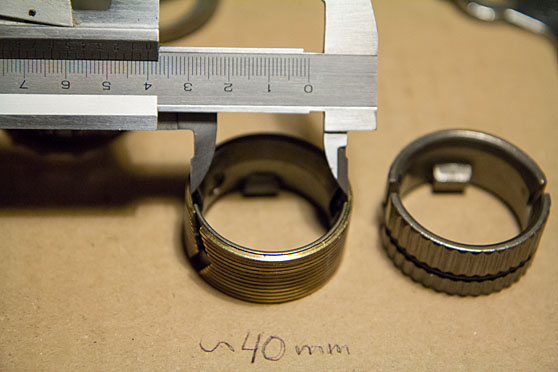
Measuring the depth of the slot in the old style brake cylinder. It's about 40mm.
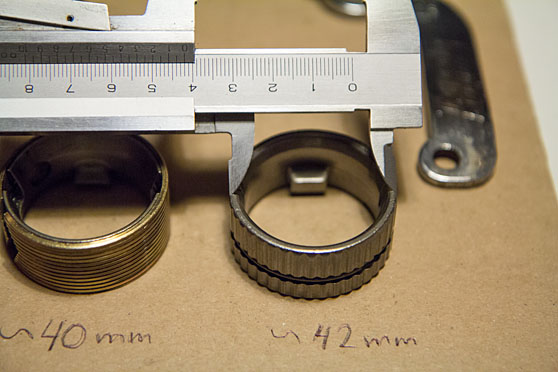
Measuring the depth of the slot in the new style brake cylinder. It's about 42mm.
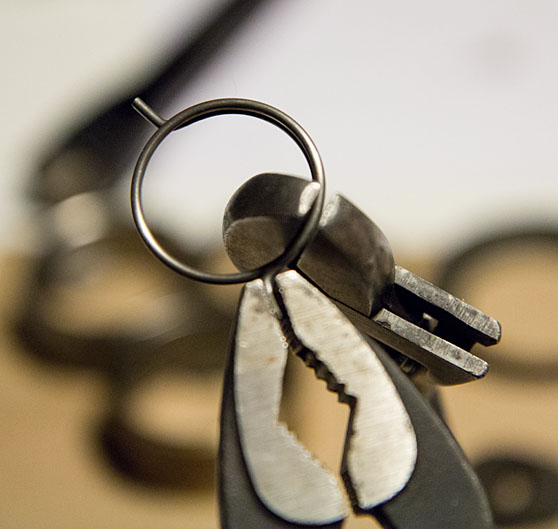
So the reach of the spring's ends need to be increased about 2 millimeters. This can be done by carefully bending it with a pair of pliers.
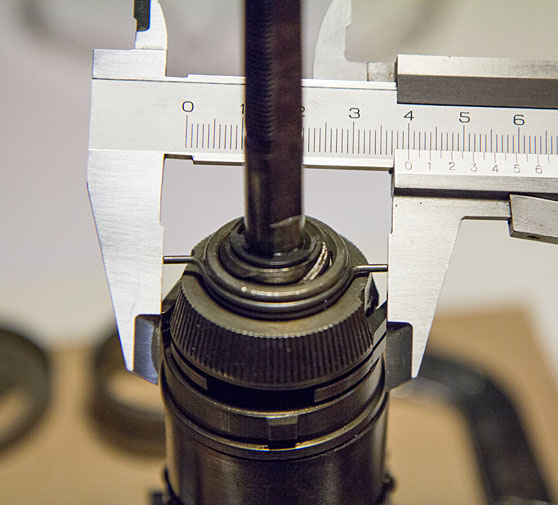
The spring's reach has been increased to about 40mm when mounted on the brake cone.
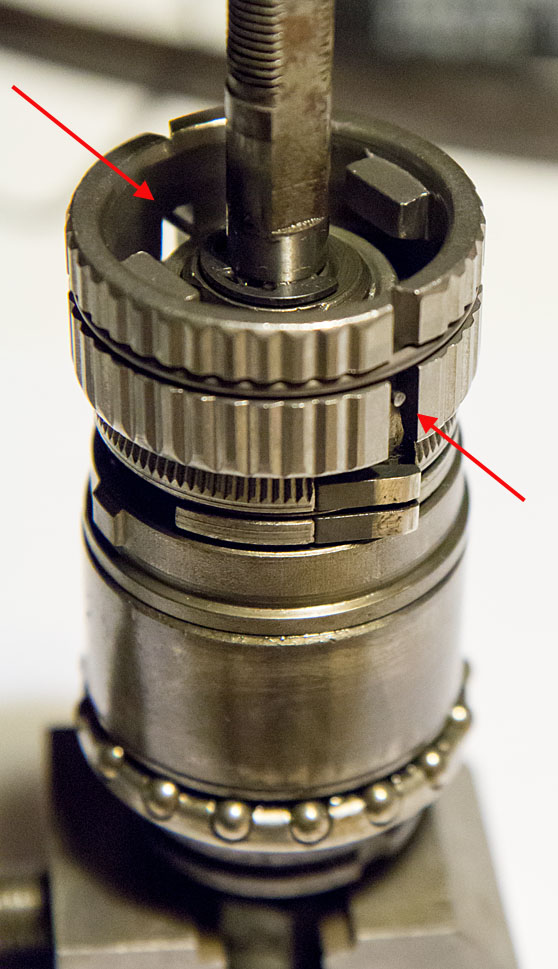
The brake cylinder test-fitted on the inner hub assembly. Notice that the spring ends are close (~1mm) to the circumference of the cylinder. They should be close to the edge but not protrude.
Important: The protruding ends of the friction spring must have a little amount of rotational play in the slots of the brake cylinder. Additionally, ensure that the "correct" side of the spring is driven by the slot in the brake cylinder, reducing the friction resistance the spring provides while driving by effectively "opening" it instead of "tightening" it. This can if necessary be achieved by angling the ends a little bit "back" in the plane of the spring like it can be seen in the first illustrations on this page, but to a lesser degree. Also remember to grease the groove that the spring sits in on the brake cone as this spring will continuously spin in the groove while you pedal forward (as the brake cylinder is fixed rotationally to the left bearing/brake cone and the right brake cone is spinning together with the rest of the internals).
At this point, you might as well disassemble and overhaul the hub completely.
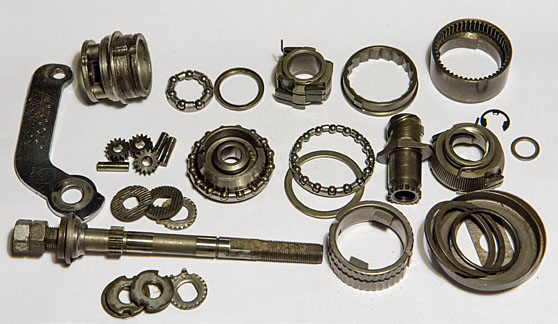
Ball bearings, gears and axles and should be lubricated with grease, the brake cylinder with high temperature resistant brake grease, but the pawl and ratchet mechanisms should only be lubricated with oil. This is very important. Ordinary ball bearing grease meant for bicycle use like Exustar E-G01+ or E-G02+ can be used for all the parts needing grease, but I use the white semi-liquid/low-viscosity "Shimano Internal Hub Grease" (part number Y04120800) on the planet gears/axles and core parts of the assembly to reduce rotational drag. Especially the inner carrier for the four pawls needs to be able to spin freely for the shifting mechanism to work properly. The three ball bearing rings should get the ordinary grease though, so it stays put even if it mixes a bit with excess oil from the inner mechanism. For oil I use ordinary motor oil, for example grade 15W-40. The officially recommended brake cylinder grease from Fichtel & Sachs or SRAM is unavailable after SRAM stopped production of internally geared hubs and spare parts in 2017, but Hanseline "Bremsmantelfett" (EAN 4002376309455) made specifically for steel coaster brakes is a great substitute. Alternatively, Shimano Roller Brake Grease (part number Y04140020 or Y04120400) can also work in a pinch, but that has a much thinner consistency and will tend to wash out over time. See also Scheunenfun's lubrication recommendations which also covers how to best lubricate the old brass type brake shoes.
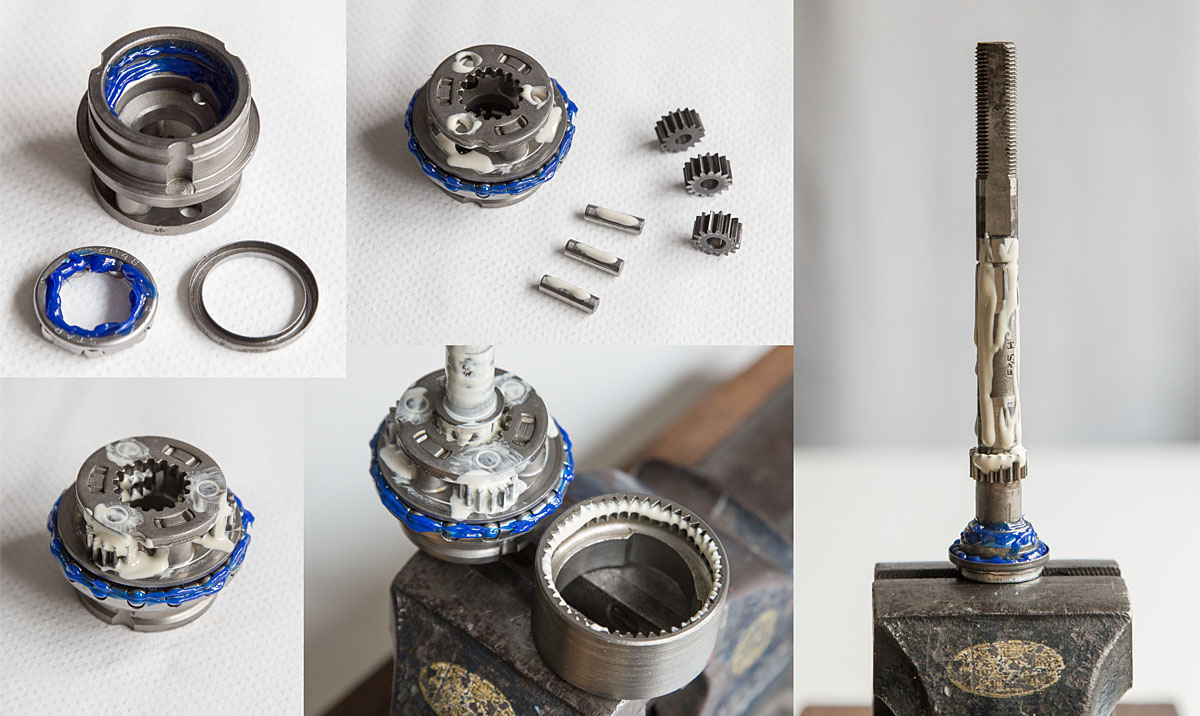
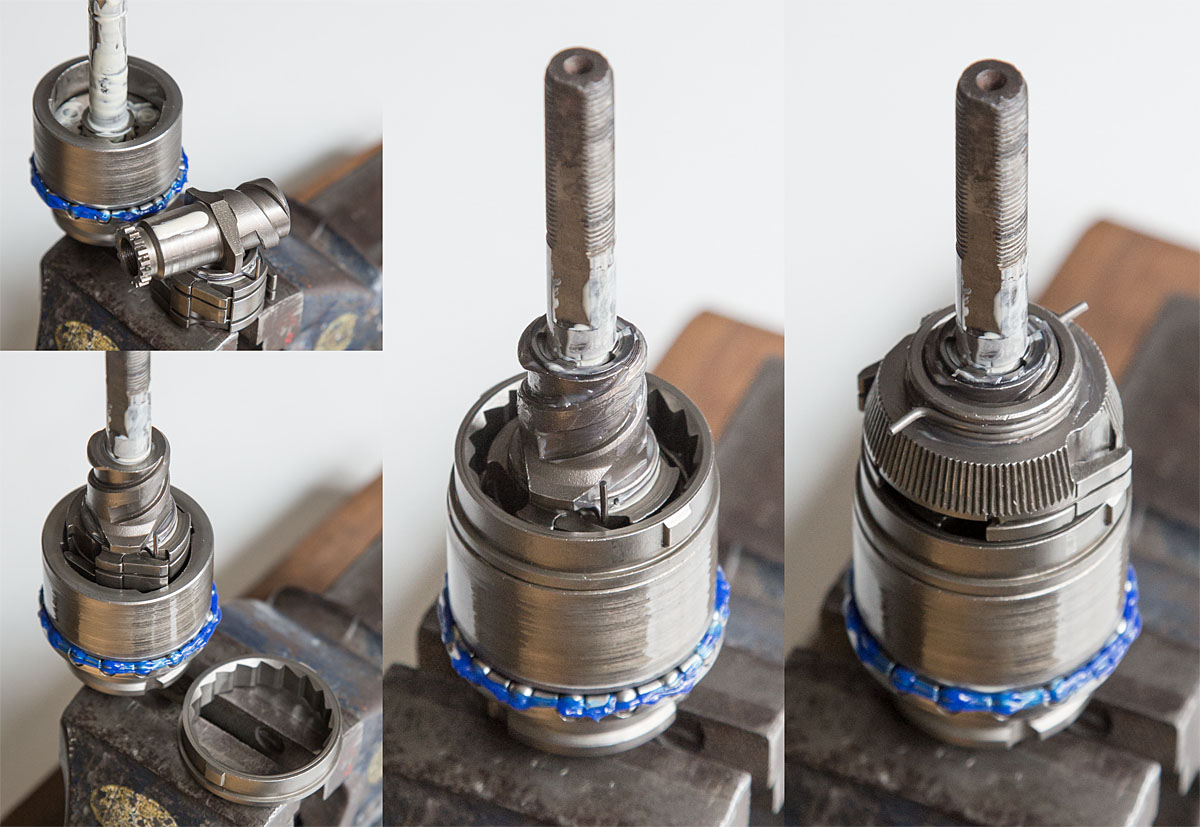
When applying brake grease the brake cylinder, also add a small "depot" in the hollowed-out section of the brake cone so the next person servicing the hub has some at hand to re-grease the brake surface. The special high-temperature grease can (and should) also be used to grease the left ball ring, as it sits very close to the brake, and ordinary ball bearing grease could melt and/or mix with the brake grease.
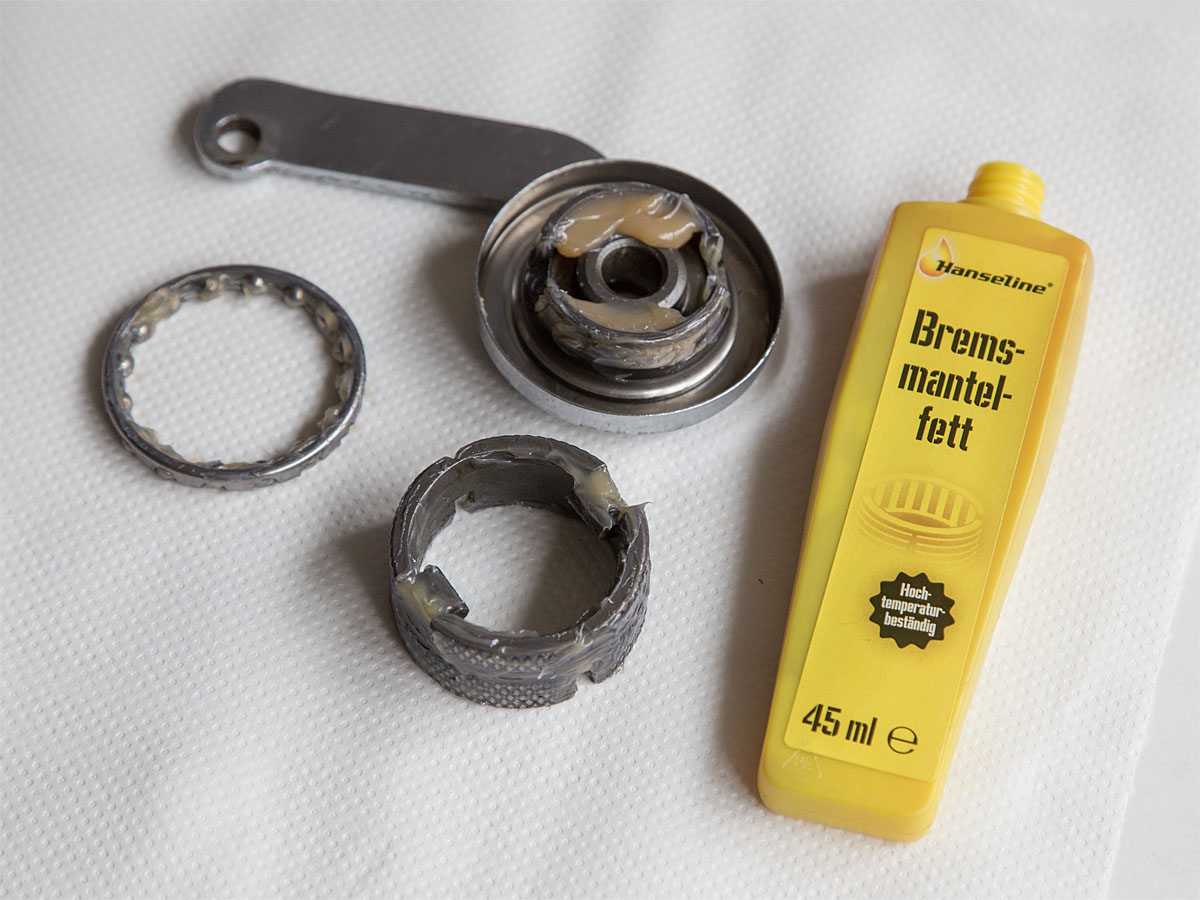
If the driver bearing is damaged, refer to this instruction for repairing it or at least improving the smoothness of the bearing.
An old, scanned instruction poster on how to disassemble and assemble the hub. Click to view the full size scan. (Thanks to Wendy via Hubstripping).
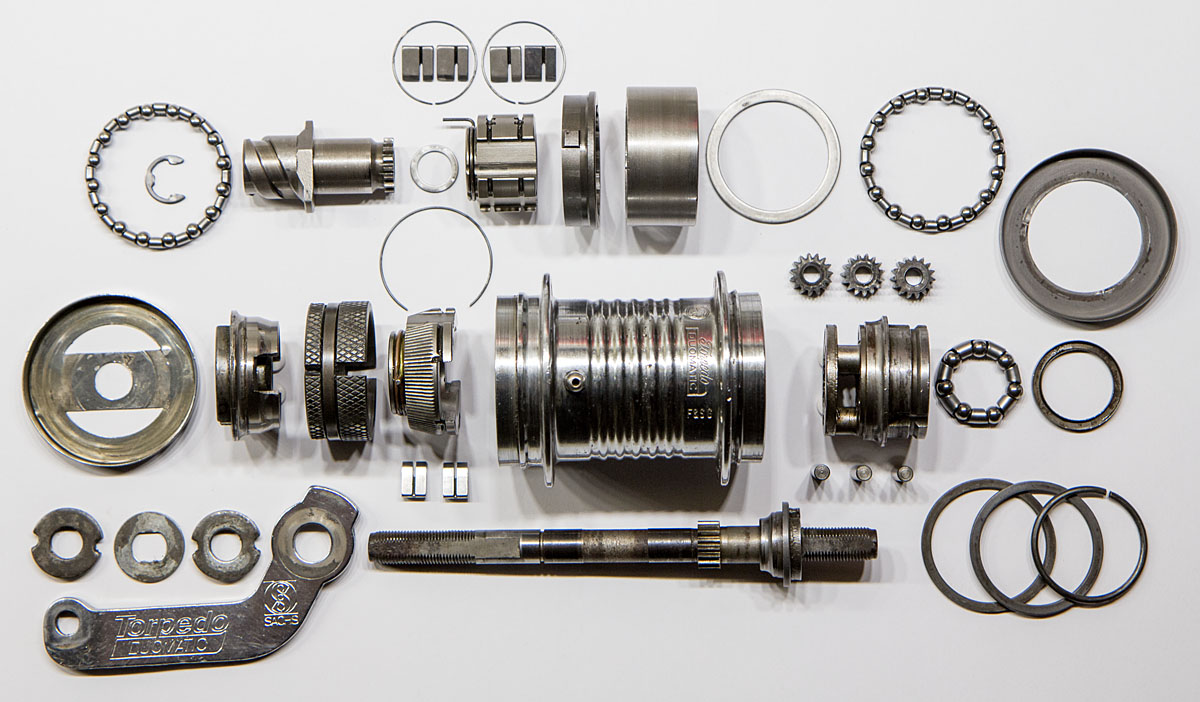
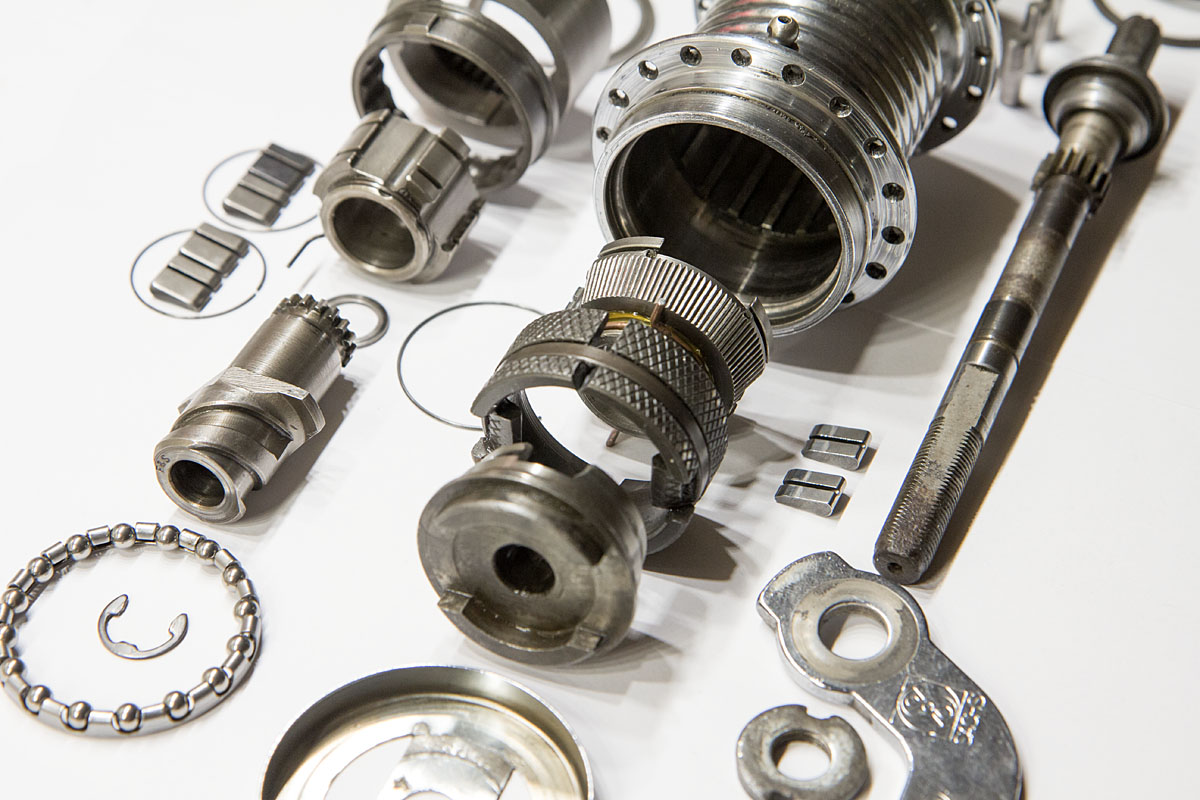
More model 102 rebuild photos:
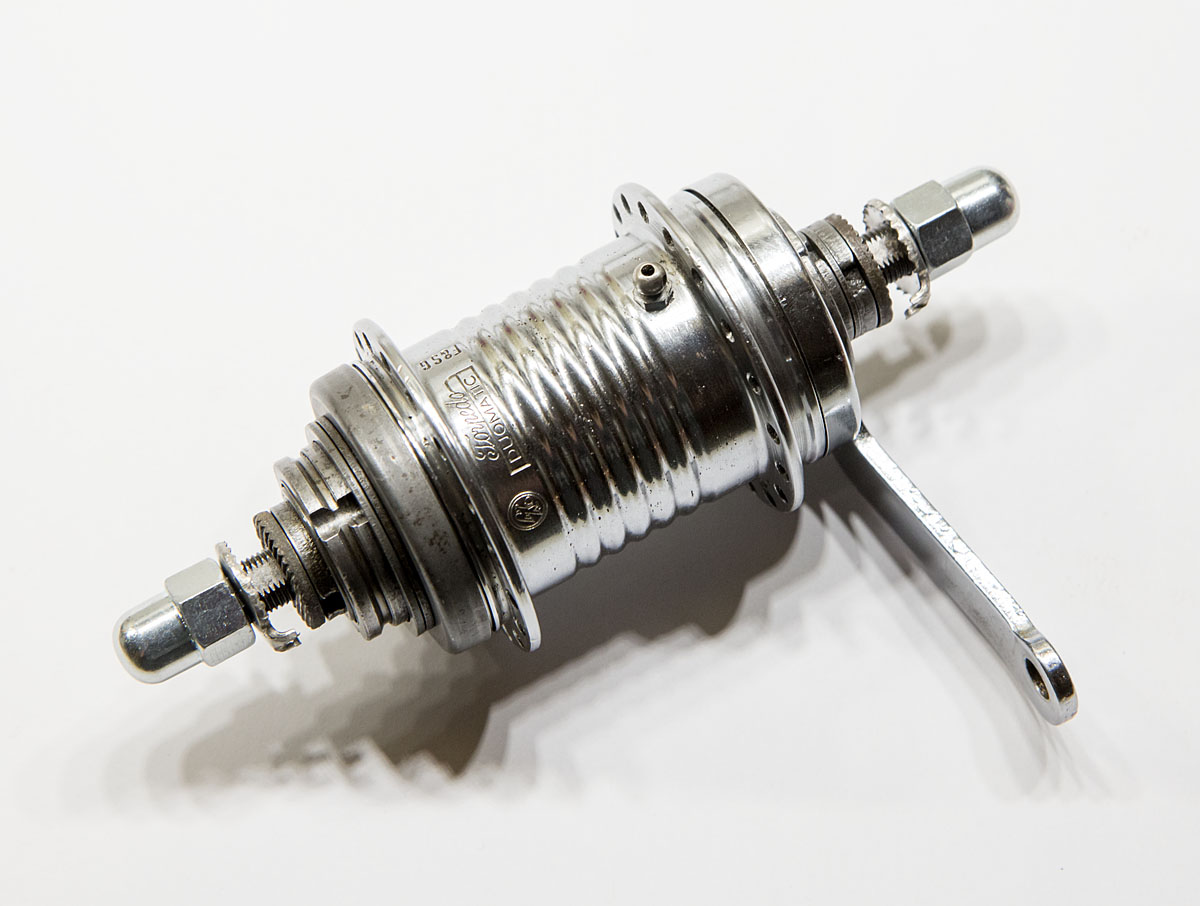
"F&S G" marking on the hub shell. See also How to determine the production year of a Sachs hub.
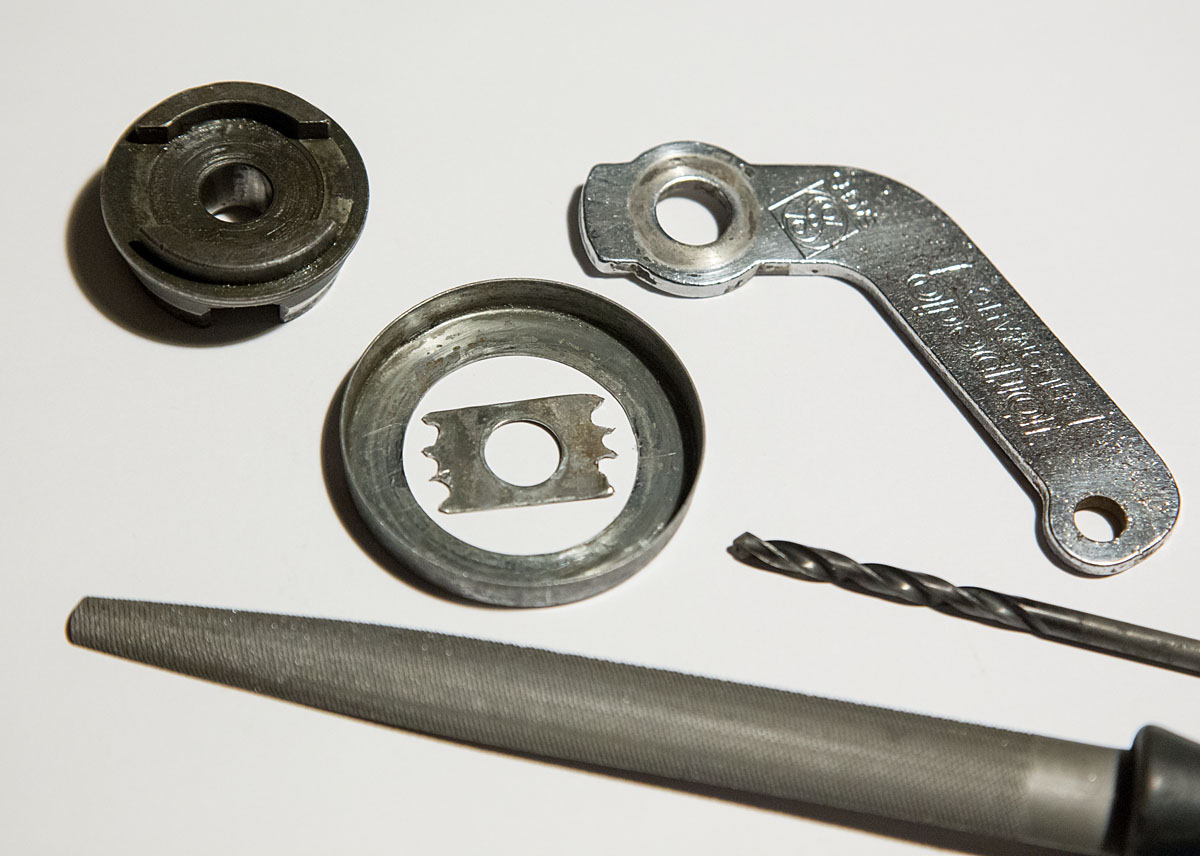
The right-side dust cover for the Duomatic 101/102 is rare as it was a specific shape that fit only those models and is often missing if you find an old used hub. The dust cover for the R2110/H3111 will not fit due to the different profile of the driver. However, a left-side dust cover from another Duomatic 102 or a less-rare Dreigang model 515 can be modified to work as a dust cover for the right side by removing the middle section of the cover like this:
Page last updated 2024-04-01 09:09. Some rights reserved (CC by 3.0)
